Stained Glass Tools for Beginners
If you are here, reading this post, it’s safe to say that you are considering trying out stained-glass as a hobby? It’s become a passion of mine! I get that it can be intimidating with all the different tools and costs involved, but don’t worry, I’m here to help! Starting with the basics is the way to go, so no need to stress about anything too fancy just yet. I’ve got a list of what you really NEED to get started, and even some of my personal favorite items. So, let’s jump in and give it a go!
Glass Cutter
When it comes to working with glass, the glass cutter is going to be your trusty sidekick. They come in all sizes, from pencil thin, to a bit bigger like a stapler. It’s all about finding the grip that feels right to you. The cutter itself uses either a diamond or hardened wheel to score the glass, which allows for a nice clean break. You’ll usually get some oil with the cutter to keep things moving smoothly. I’ve used several cutters, but I really prefer the bigger grips – they just feel better in my hand. Right now I’m using the Pistol Oil Glass Cutter – super affordable and does the job perfectly. You even get a backup cutter and replacement blades – so handy! Definitely worth considering this one if you’re just starting out.
Pliers
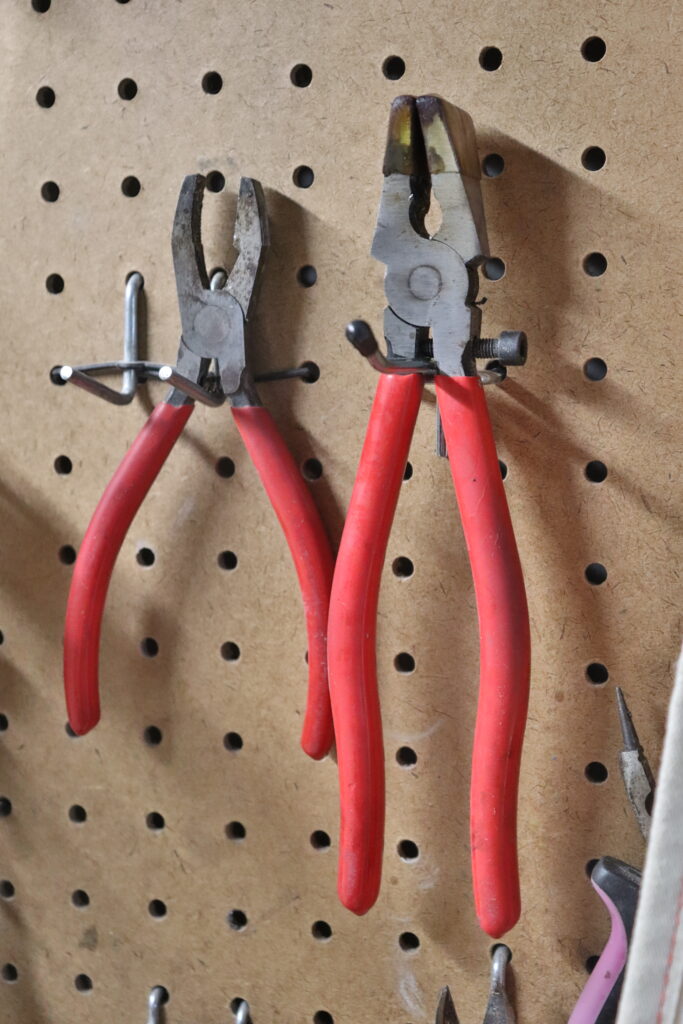
After you’ve scored your glass with the cutter, it’s time to break it apart. Some people say you can use your hands but I’ve never been comfortable doing that. I prefer using pliers to get the job done. You will want to start with two essential pliers, Running Pliers, and Grozing Pliers.
Running Pliers– Running pliers are used to help you “run the score”. They are used to apply pressure to either side of the scoreline. You will notice that they have a slight U shape, with a line in the center that you want to place directly on your score line. I am currently using the Swpeet Heavy Duty Key Fob Pliers Tool. It’s very affordable and great to begin with!
Grozing Pliers- or Grozers, which means using the serrated edges of the jaws to remove stubborn nubs and tidy edges during cutting. They will nip any uneven edges that you may have and save you LOTS of time when it comes to grinding. I am currently using my original Grozers which were made by Hilitchi. This particular set actually includes the Grozing Pliers and the Running Pliers for a great price.
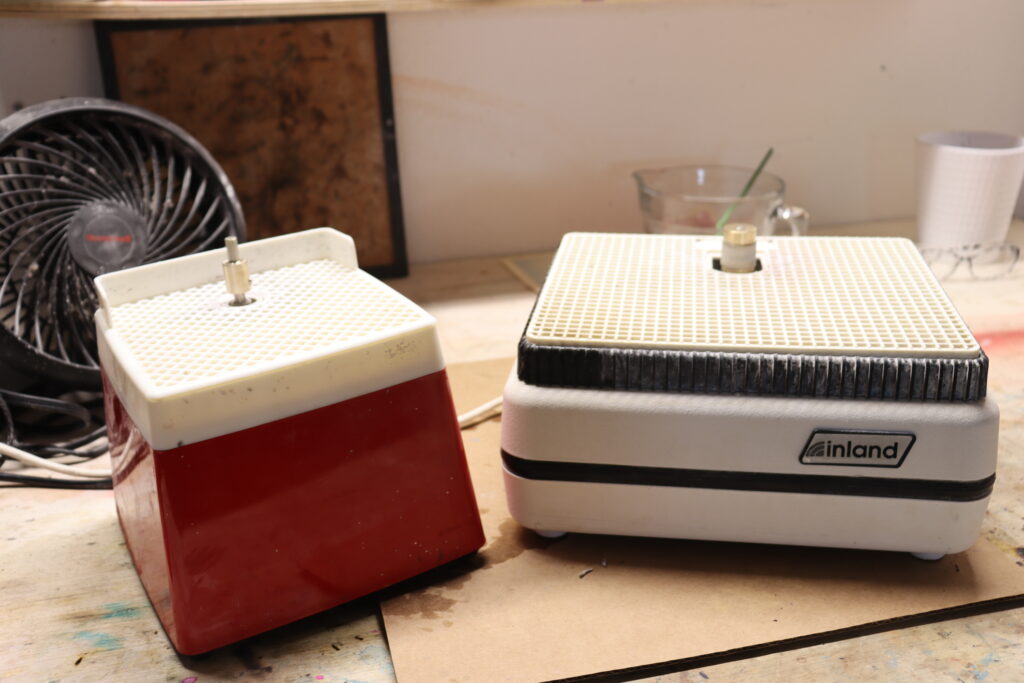
Glass Grinder
When I first started my stained glass hobby, I tried to bypass the grinder for a less expensive grinding stone. The stone didn’t get me through my first stained glass project and I quickly bought my first grinder. I now own two grinders and usually use them both simultaneously. The first one that I purchased was the Podoy Stained Glass Griner Mini. It has held up for years and gets the job done! I was later given the Inland Glass Grinder, which is double the price but gives a much smoother grind. As I said, I use them both and have different-sized bits on each. This makes it easier so that I don’t have to change out bit sizes when needing a smaller bit size. However, when starting out I would suggest sticking with the bit that comes with the machine. You will know when you’re ready for different bit sizes.

Copper Foil
Copper foil is a thin copper tape that is used to join your pieces of glass together. Its conductive adhesive helps create a bond. It comes in different widths, weights, and backings. The width of the foil will affect the size of your solder line. I am currently using double-sided copper foil that is 1/4 inch thick from EMI Shielding Stained Glass Supplies. This would be a nice one to start with!
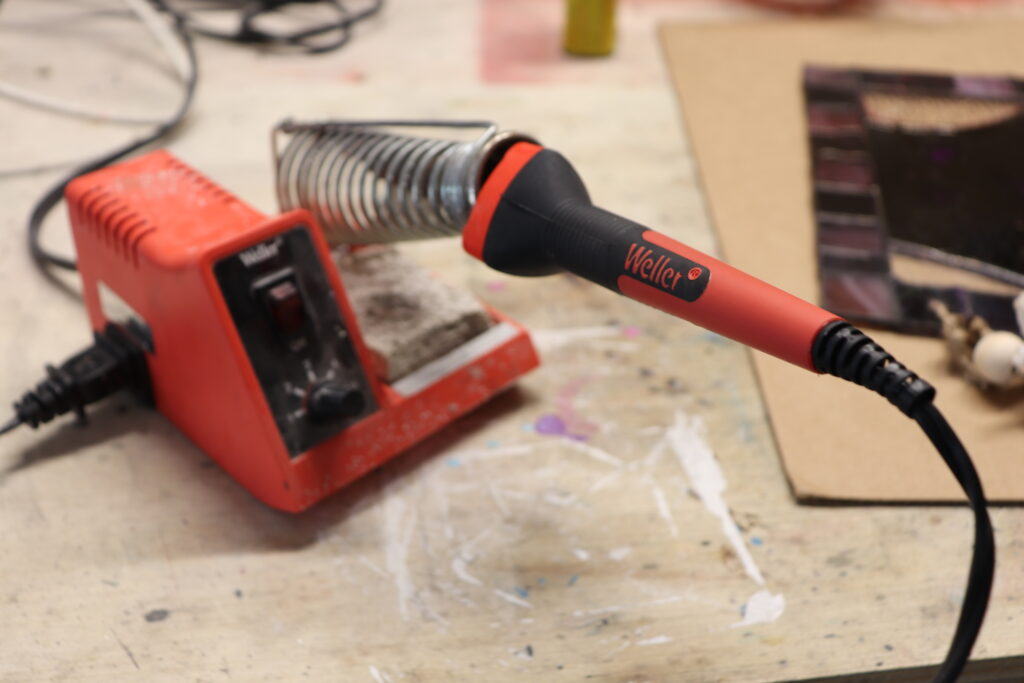
Soldering Iron
A soldering iron is a hand tool used to solder. It supplies heat to melt the solder so that it can flow into the joints between your glass pieces. It is composed of a heated metal tip and insulated handle. I am currently using the Weller SP80NUS 80-Watt LED Soldering Iron. However, I started out with the Weller 40W Digital Soldering Station, which I love because you can adjust the temperature of your iron. You really can’t go wrong with a Weller!

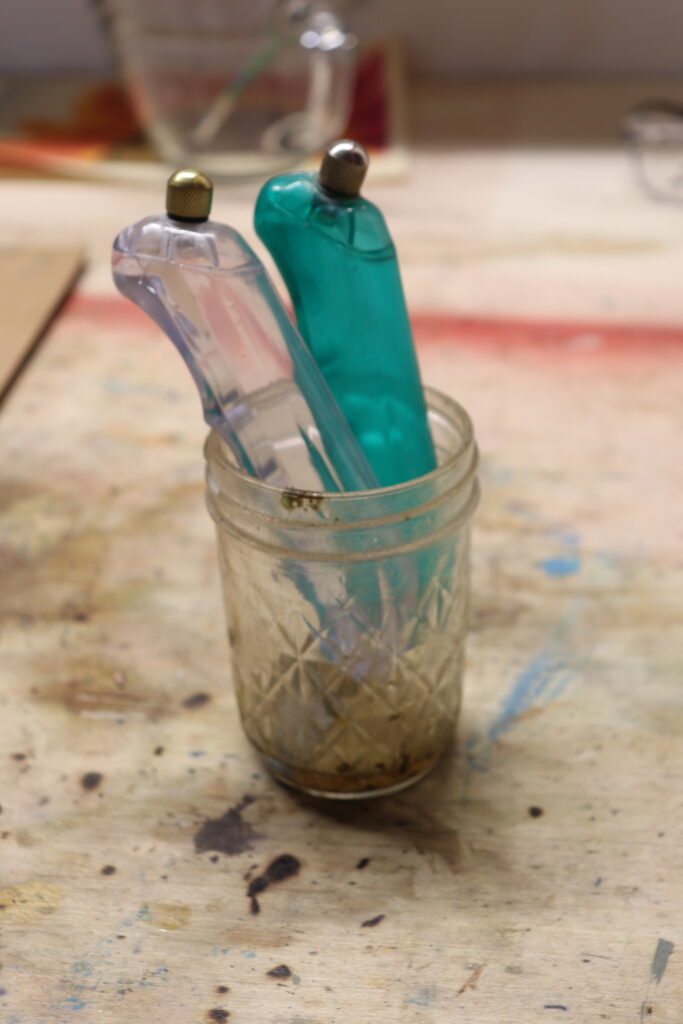
Flux
The word “flux” means flow. Flux is used to clean your surface before you solder your pieces together. You can use an old paintbrush to lightly coat the surface of your copper tape. This will allow the metal to flow nicely between your stained glass pieces. Flux can be a thin liquid or a thicker gel. I prefer the liquid because it is a bit cleaner to work with. Currently, I am using Studio Pro Safety Flux. It’s light, clean and easy to use!
Solder
Solder is a low-melting alloy, typically made of lead and tin, that is used to join glass pieces together. There are two types of solder: 60/40 or 50/50. For most stained-glass projects, the 60/40 type is recommended because it contains 60% tin and 40% lead. Canfield 60/40 solder for stained glass would be a great solder to use. They even have a Canfield 60/40 4lb pack that I’ve purchased several times if you decide to buy in bulk.

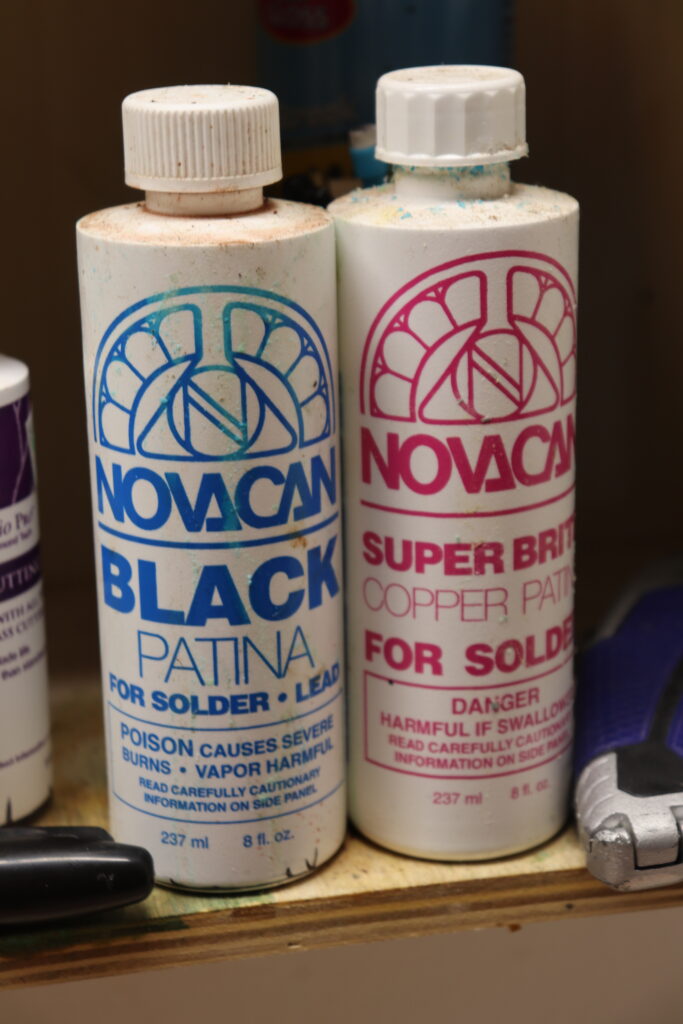
Patina
Patina is a chemical that reacts with solder and changes its color. There are two types of Patina—black or copper. I personally prefer the black variant, but your preference may vary. It would be best to experiment with both to see which one suits you better. Patina naturally occurs in metals from oxidation over a long period. The chemical speeds up this process, giving the piece a nice finished look. I use the Novacan Black Patina most often, but they also make a Novacan Two Pack that comes with both colors and two brushes as well!
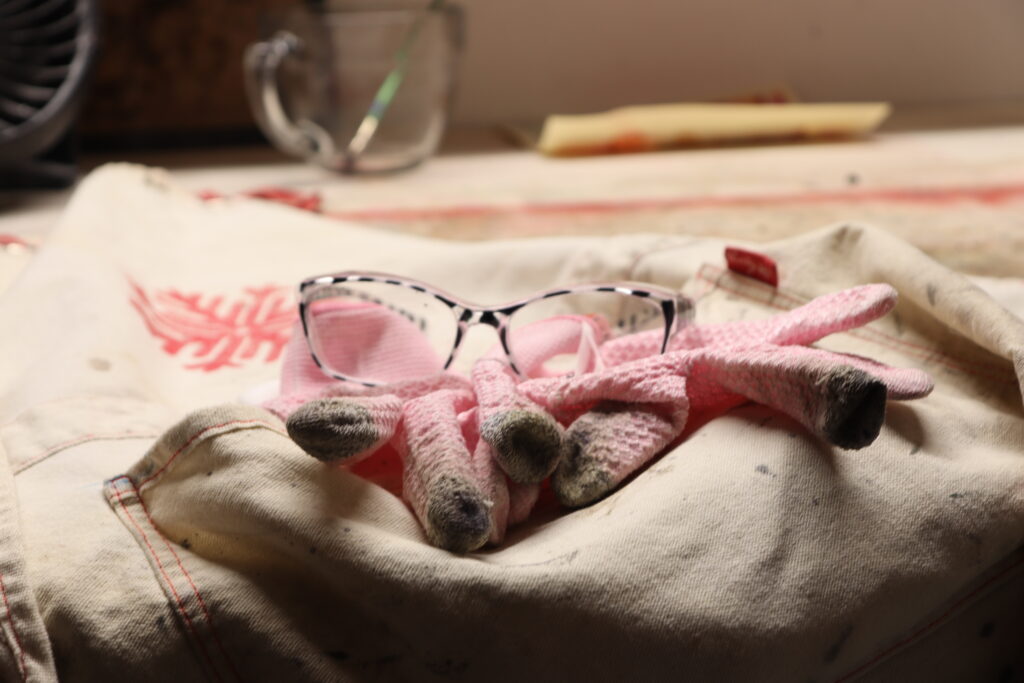
Safety Equipment
Last, but certainly not least, is your safety equipment! Making stained glass can have many hazards if you’re not safe. You will need to be sure to have gloves to protect your hands from the sharp glass that you will be working with. I’m really loving my TELION Cut Resistant Gloves because they protect my hands, but are thin enough for me to work with. You will also need safety goggles to protect your eyes from glass and heat. I’m not going to lie, I bought these cute black leopard print safety goggles simply because they were cute and cheap! They’ve lasted a long time and I’ve been extremely happy with them. They even came in a two-pack! Lastly, I use a thick kitchen apron to protect my legs when working. It’s not uncommon for bits of glass or hot metal to fall into your lap. Be sure to have something thick enough to protect you from these hazards.